Author Archives: GCSDev

Cleaning your Kitchen Cabinets

Care and Cleaning Guidelines for your cabinetry

Be gentle when cleaning the kitchen Cabinets!

Be gentle when cleaning the kitchen Cabinets!


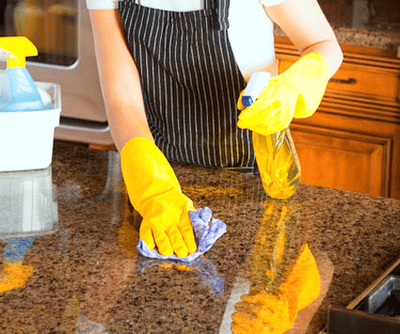
A soft cotton cloth dampened with warm water is usually sufficient to clean your cabinets. If more thorough cleaning is required, use one of the following cleaning solutions:

  • A fresh solution of dishwashing liquid mixed with warm water.
  • A mild all-purpose cleaner. Make sure it does not contain ammonia or silicone.

Use the mildest cleaning solution that will successfully clean your cabinets. Stronger products may damage or discolor your cabinet finish and are not recommended.

After cleaning, wipe all surfaces with a clean, damp cloth. Dry immediately, using another soft, clean cloth.

Splatters and Spills

Clean spills and splatters immediately. Prolonged exposure to spills, including food, water or other liquids, or to oil and grease splatters, can cause permanent discoloration or damage to your cabinet’s finish.

Cleaning Products to Avoid

Avoid using the following cleaning products on your cabinets:

  • Harsh chemicals.
  • Abrasive cleaning products such as tub and sink cleansers, scouring powder, scouring pads or steel wool.
  • Sponges or dish clothes. They may contain particles that could scratch your cabinets, or they may contain food and oil residue.
  • Solvent-based or petroleum-based products such as mineral spirits, nail-polish removers or paint thinners.
  • Ammonia or cleaning products that include ammonia.
  • Bleach or cleaning products that include bleach.
  • Silicone-based cleaning, waxing, or polishing products.
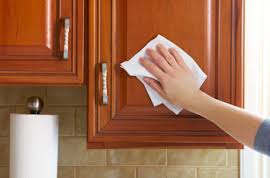
Regular Dusting

Use a clean, soft lint-free cotton cloth for regular dusting.

Packaged dusting sheets are not required or recommended. Do not use pre-moistened dusting sheets, and do not use aerosol products made for dusting.

Waxing and Polishing

Waxing is not required or recommended. Over time, waxing and polishing compounds may build up on the surface of your cabinets and cause a hazy, streaky or yellowed appearance. This wax build up is very difficult to remove.

Cleaning Glass Doors

Extra care is required when cleaning glass doors. Spray an ammonia-free glass cleaner on a clean, soft, lint-free cloth or paper towel. Do not spray cleaner directly on the glass. It could seep behind the window dividers and cause damage.

Scratches, Gouges and Nicks

A Touch-Up Kit is available to hide surface damage. Contact the place of business where you purchased your cabinetry to purchase the color-matched touch-up kit for your specific cabinets.

Use the kit’s touch-up pen to hide minor blemishes. Use the kit’s tinted putty stick to fill deeper scratches, gouges or nicks. Detailed instructions are provided in each kit.

Avoid Moisture Damage

Avoid draping damp clothes or dishtowels over cabinet doors. This moisture can cause permanent damage — such peeling and discoloration — to the cabinet’s finish.

Avoid Heat Damage

The heat generated when using an oven’s self-cleaning feature is much greater than during normal cooking. If this heat escapes from the oven, it can damage your cabinets. While this is a rare circumstance, you can minimize the risk of cabinet damage by removing cabinet doors and drawers nearest the oven before using its self-cleaning feature.

Avoid Light Damage

Exposure to direct sunlight tends to darken the color of natural wood products. Sunlight can also fade painted wood surfaces, laminated surfaces and thermofoil surfaces. You should consider draperies or blinds to shield your cabinets from direct sunlight.

Hire a professional remodeler, the benefits are endless!

Top reasons to hire a professional design and remodel team:

We’re often asked about the advantages of design-build over the conventional system of a “contractor”. It’s a great question and with over two decades of design-remodel experience under our belts, we feel like it’s a good time to call out our top few reasons why the design-remodel system is so good.

1. Everybody is on the same team: We’re all in this together and we all have the same goal –to arrive at a successful kitchen, bath or closet system that meets or exceeds your expectations for your project. When challenges are encountered on a project (and there are always challenges), pointing fingers is not an option, everyone rolls up their sleeves and works on solutions.

2. Total accountability: One entity is accountable for everything –including how the end result looks, how much it costs and the timeline of completion. When the same group that designs the project also builds the project, there tends to be much more attention given to pricing and scheduling in the design phase. The cost of everything is taken into account early on in the process; all fees, construction costs, materials –everything.

Unfortunately, it’s not unusual for us to hear from people that “their remodel cost twice as much as the architect said it would” –such a scenario is entirely unacceptable in the design-remodel world. Design-remodel focuses on results, not excuses.

3. Continuity: A design-remodel firm is involved from start to finish, which adds an inherent efficiency. The chance for things to fall through the cracks is greatly diminished.

4. Professional guides: We’ve all heard the stories that design and construction can get out of hand and messy. Design and construction shouldn’t be chaotic or stressful. A design-remodel firm is a beacon to clients throughout the process, guiding the way to the best possible outcome. Design-remodel refines a system from beginning to end and manages the chaos into orderly steps via COMMUNICATION.

5. Involvement: Design-remodel operates under the assumption that the client actually wants to be an active participant in the design and remodel of their kitchen or bath. By taking an involvement they’re guaranteeing that they get the outcome and satisfaction of their goals – what they want is going to be achieved. We’ve found that such an involvement is inspiring and gives people a lasting sense of pride about their home.

6. Collaboration: Design-remodel cuts out the big egos so common in the design industry. In design-remodel the client retains total control over the project and the team is there to empower them.

7. The best kind of communication is open, honest and often:  The best partnerships work, not because people say what everyone wants to hear, but because they say what everyone needs to hear. Through clear communication the budget is defined early on and it becomes the agreement for the entire project.

8. Cost savings: Inherent to the design-remodel model is a savings of approximately 10% of the project costs. We’ll save the details for a future post but here’s the quick look:

* Disclaimer: it’s possible to have nearly everything above with the traditional system of architect and builder; it’s just that we so rarely see it.  Typically it takes architects and builders decades of working together before they reach such efficiency with communication, mutual respect and trust.


Welcome to Grande Decor blog

Joe and Stephanie Gillin welcome you to their remodeling and interior design blog.

Located in Springfield PA, Grande Decor provides a full range of construction services including whole house renovations, bathroom and kitchen remodels, new additions and much more. Using design/remodel processes, we have a proven record of satisfying our clients, meeting deadlines and staying within budget. We invite you to review our portfolio, read what our clients have had to say, and then contact us to learn how we can make your renovation or new home construction a pleasant experience.

Top 10 Kitchen Cleaning Secrets

Here is a list of our Top Ten Kitchen Cleaning SECRETS:

  1. Microwave interior:  place 5-7 wet paper towels in the microwave.  Run the appliance on high for 3-5 minutes.  The steam from the paper towels will soften grim.  Once the towels cool, wipe down the interior!
  2. Garbage Disposal:   to disinfect and give your garbage disposal a deep clean, grid a dozen ice cubes made of equal parts water and vinegar.
  3. Stone Countertop Stains:  to remove most coffee or juice stains use a little hydrogen peroxide in water, plus a few drops of ammonia.
  4. Tile Backsplash:  to get a like new feel for your backsplash tiles, mix half a cup of baking soda into two gallons of water. Then scrub with a sponge.
  5. Wood Floors:   in a bucket, mix nine parts warm water with 1 part white vinegar and mop to make the floor shine like new.
  6. Oven Glass:  please  refer to:  the ask anna blog for this one!  It is a great tip!
  7.  Dish Towels:  to get rid of a mildew smell wash them, in the washer, with hot water and some white vinegar…only.  Then dryer sheet dry them.
  8. Stove Burners:  Take about 1/4 cup of ammonia and seal it up with one of the burners in a large ziploc bag.  You only need a little ammonia in the bag.  You are not trying to soak the burner… you just want to seal it up with the ammonia fumes.  Let it sit over night (outside) on a cookie sheet.  The next day, wipe them down with a sponge.
  9. Stainless Steel Sink:  sprinkle baking soda in the sink and with a warm wet sponge “buff” in a circular motion the sink.  Rinse.
  10. Stainless Steel Appliances:  warm water on a sponge and cream of tartar.  Wipe with a white towel after.

Tips and Tricks for Cleaning and Sealing Your Granite Countertops

Cleaning and Sealing your granite countertops:

You will be happy to hear just how easy it is to do an annual cleaning and sealing of your granite counter(s).

1. First clean your countertop thoroughly using a natural cleaner. Never clean with any product containing acid, lemon, or bleach. Acids, even a light solution of vinegar and water, will eventually etch and damage natural stone. Do not use scouring powders or creams; these products contain abrasives that may scratch the surface.

2. Now apply the stone sealer. Stone sealers will need to be reapplied as soon as you notice water no longer stands (beads up) on the surface.

Simple and quick way to shine and seal your natural stone countertop

Simple and quick way to shine and seal your natural stone countertop

Tips:

-I use a sealer and cleaner on our slate tops, which eliminates one of the two steps. It is called “Cleaner/Re-Sealer” by StoneSpecific.

-Make sure you buy a spray cleaner and/or sealer conducive of your countertop material. For example; we have a honed slate material, so I buy a product with that description. Whereas someone with polished granite should look for a natural stone cleaner/sealer.